設定 FileZilla_Server
此篇文章 的 FileZilla_Server 版本為 FileZilla_Server-0_9_60_1
啟動FileZilla Server 開啟設定頁 Edit => Settings
設定Passive mode settings (被動模式)
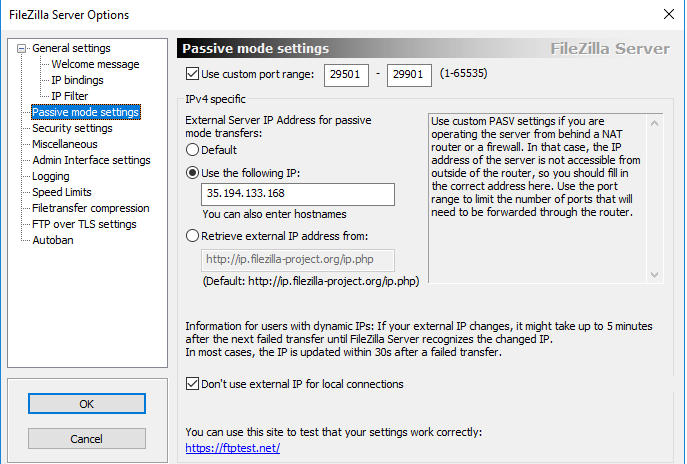
FTP 主動模式、被動模式
主動模式: FTP Server 主動連入 Client端 進行檔案接收或傳送
若Client 端藏在內網 或防火牆內, FTP Server無法主動連入 可使用被動模式.被動模式: FTP Server 被動接收 Client端 進行檔案接收或傳送
FTP Server 自定義其他port 來進行 data connection transfer設定 FTP over TLS settings
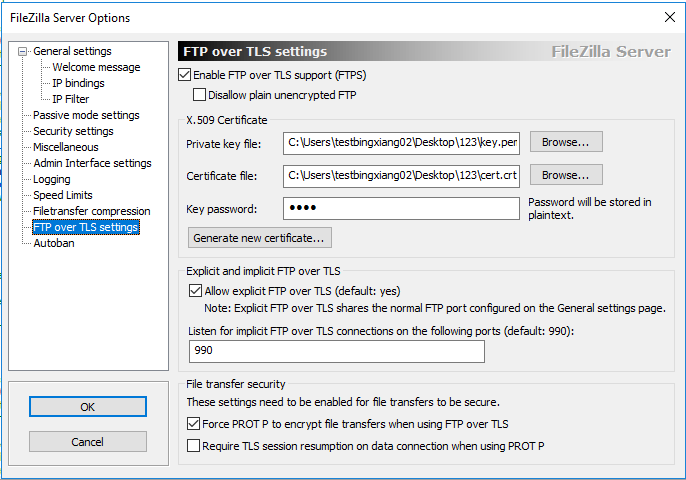
FileZilla Server 有提供自建憑證功能 但期限只有一年
防火牆需要開啟 21(FTP)、Custom port range區間、implicit port(預設 990)設定Users 開啟設定頁 Edit => Users
建立帳號、密碼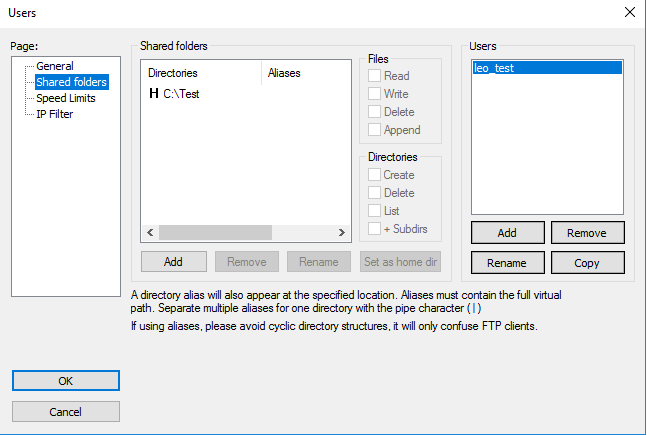
設定該帳號 資料夾權限 (H為登入後預設跟目錄)

至此 FTPS 服務 已成功建立
以openssl 自產憑證
因 FileZilla Server內建憑證功能 只有一年期限, 故可採自產憑證方式 延長期限
下載 https://slproweb.com/products/Win32OpenSSL.html Win64 OpenSSL v3.0.0 MSI
安裝完後 啟動Win64 OpenSSL Command Prompt

建立憑證 期限100年
openssl req -x509 -outform PEM -newkey rsa:4096 -keyout key.pem -out cert.crt -days 36500依序填入password、Country Name、State、Locality Name、Organization Name、Organizational Unit Name、Common Name、Email
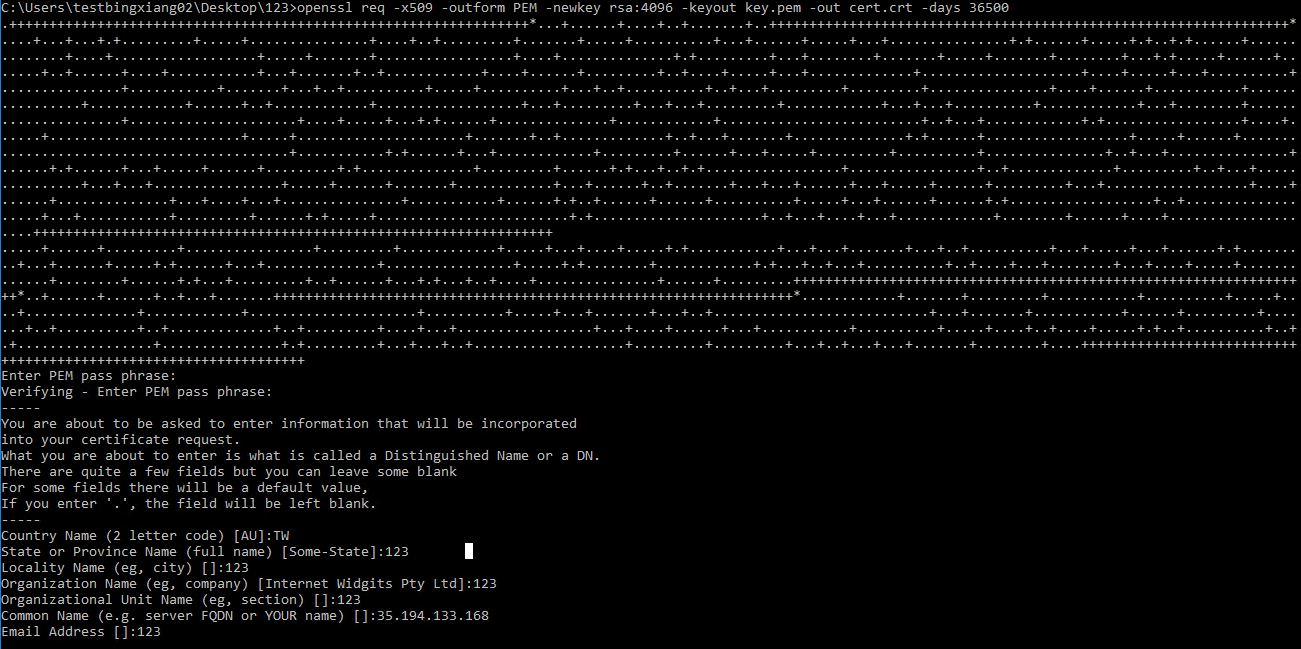
建立成功後 可以得到 cert.crt、key.pem

加進 FileZilla Server 憑證區
Private key file 選定 key.pem
Certificate file 選定 cert.crt
Key password 輸入 建立憑證的password
Common Name 需與 連線的FTP站台一致
若以IP連線 Common Name則為相同IP
若以domain連線 Common Name則為相同domain
至此 已成功自產憑證 並匯入 FileZilla Server
匯入Client端 信任憑證
- 因為是自產憑證, 故需手動匯入 將憑證傳給Client端
- Client 以administrator 權限開啟power shell
certutil -addstore -f "ROOT" cert.crt

# 輸出
ROOT "受信任的根憑證授權單位"
簽章符合公開金鑰
憑證 "123" 已新增到存放區中。
CertUtil: -addstore 命令成功完成。
查看憑證是否匯入
開啟 憑證管理員
Windows + R 執行 > certlm.msc
轉載請註明來源,若有任何錯誤或表達不清楚的地方,歡迎在下方評論區留言,也可以來信至 leozheng0621@gmail.com
如果文章對您有幫助,歡迎斗內(donate),請我喝杯咖啡

