前言
本篇記錄 透過 GitHub Actions 自動化佈署至 GitHub Pages 的 Blog
環境
- Windows 10 (home 21H2)
流程
當文章撰寫好並推送到 blog-source 後,GitHub Actions 會自動佈署至 blog
- blog-source: 私有的 GitHub Repo (撰寫Hexo Source文章)
- blog: 公開的 GitHub Repo (GitHub Pages)
前置作業
安裝 hexo-deployer-git 可參考 w4560000 - 上傳至 GitHub Page
調整 /_config.yml
改為 SSH 方式
 deploy:
   type: git
-  repo: https://github.com/w4560000/w4560000.github.io.git
+  repo: git@github.com:w4560000/w4560000.github.io.git
   branch: master
流程
調整 package.json,新增 npm script
- hs: 本機測試
- hd: 佈署至 GitHub Pages
package.json
...
"scripts": {
    ...,
+   "hs": "hexo clean && hexo g && hexo s",
+   "hd": "hexo clean && hexo g && hexo d"
    ...,
},
...
建立 SSH key (無密碼版本)
ssh-keygen -t rsa -b 4096 -f actions-deploy-key -N ""- actions-deploy-key.pub (公鑰)
- actions-deploy-key (私鑰)
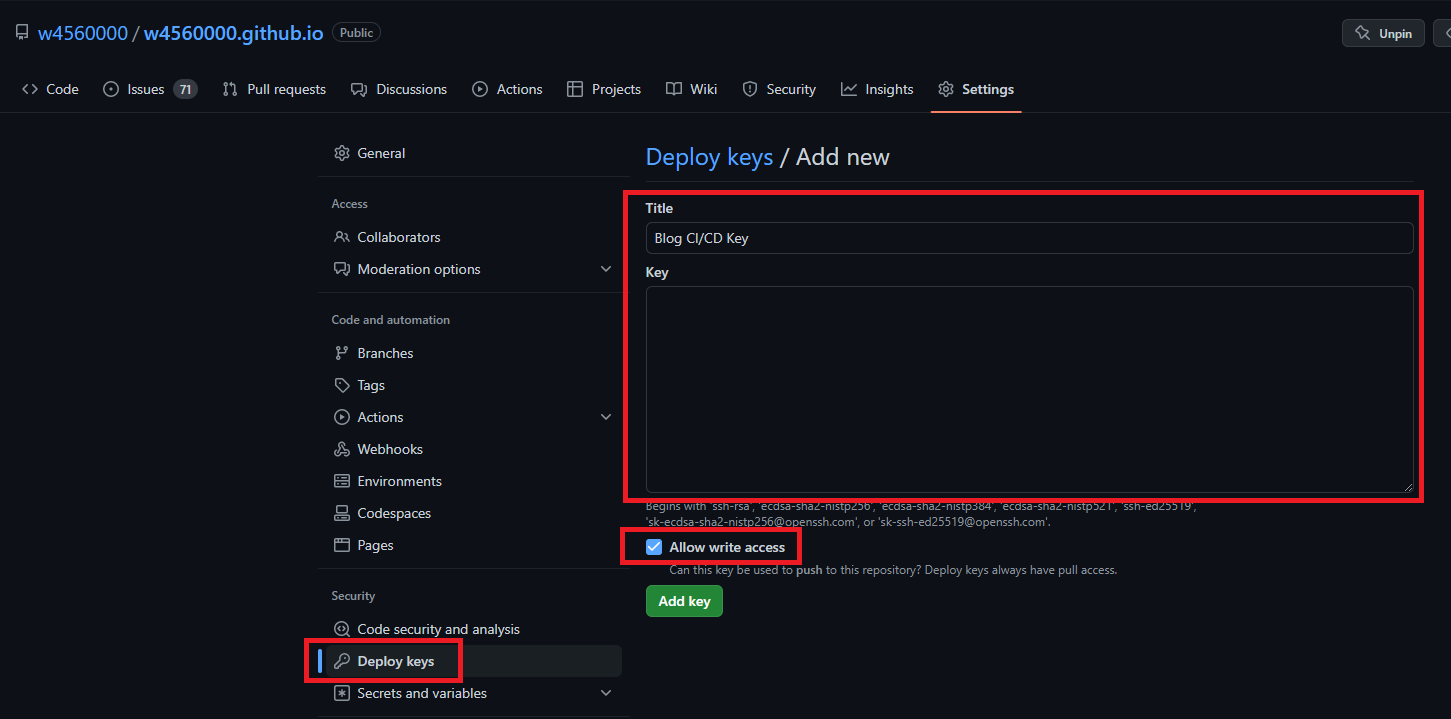
在 GitHub Pages Repo 上設定 Deploy Key
將公鑰設定至 Deploy Key,Title可以隨便取 (記得 Allow write access 要勾選)
在 Hexo Source Repo 上設定私鑰
將私鑰設定到 Action secrets,Name = DEPLOY_KEY (待會設定 GitHub Actions yaml 會用到)

在 Hexo Source Repo 上設定 GitHub Actions

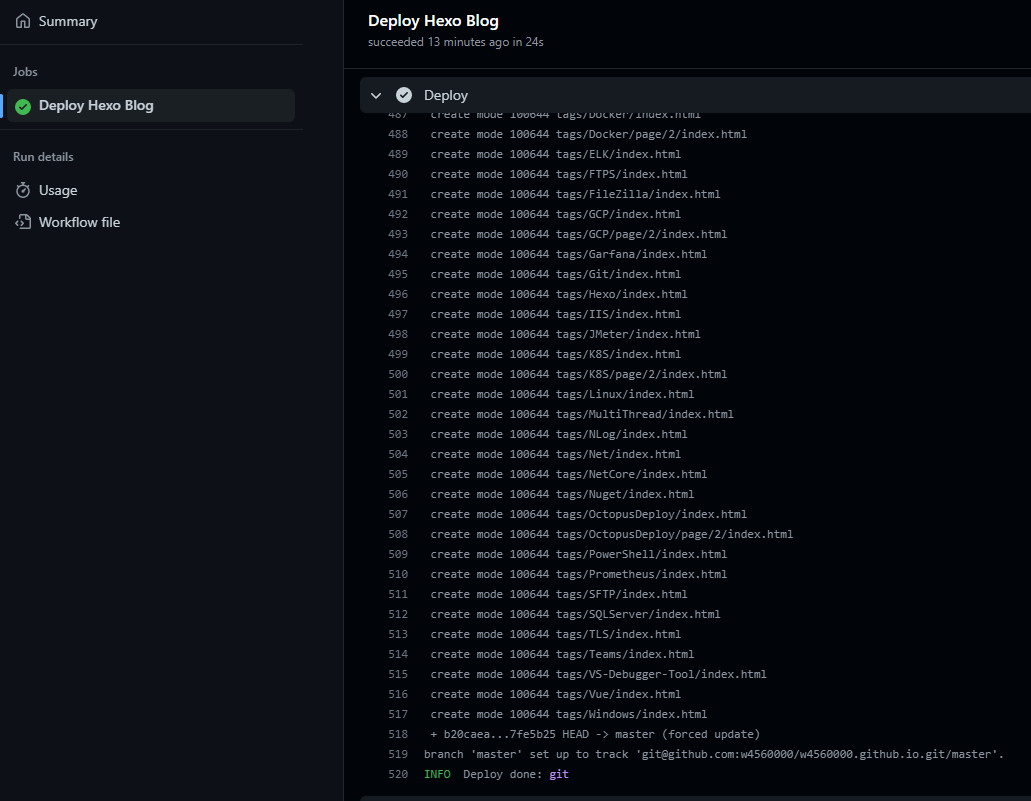
主要流程是 npm install後,接著設定 SSH 連線、Git Config,最後 Deploy
name: Deploy
on: [push]

jobs:
build:
    runs-on: ubuntu-latest
    name: Deploy Hexo Blog
    steps:
    - name: Checkout
    uses: actions/checkout@v1

    - name: Cache node modules
    uses: actions/cache@v2
    id: cache
    with:
        path: node_modules
        key: ${{ runner.OS }}-npm-cache
        restore-keys: |
        ${{ runner.OS }}-npm-cache

    - name: Install Dependencies
    run: npm install

    - name: Deploy
    run: |
        mkdir -p ~/.ssh/
        echo "${{ secrets.DEPLOY_KEY }}" > ~/.ssh/id_rsa
        chmod 600 ~/.ssh/id_rsa
        ssh-keyscan github.com >> ~/.ssh/known_hosts

        git config --global user.name "$YOUR_GITHUB_USERNAME>"
        git config --global user.email "$YOUR_GITHUB_EMAIL"

        npm run hd

    - name: Get the output
    run: |
        echo "${{ steps.deploy.outputs.notify }}"
設定完成後,當 Hexo Source Repo 有異動時,會自動 Trigger GitHub Actions 佈署至 GitHub Pages
補充
若要在本機直接佈署到GitHub Pages,也可以直接跑 npm run hd
但因已設為 SSH 方式,本機也要調整一下設定
- 將私鑰放到使用者的對應的 .ssh 資料夾內 (ex: C:\Users\leo.zheng\.ssh)
- 將私鑰檔名改成 id_rsa (預設是吃 id_rsa)
- 測試一下連線是否正常
ssh -T git@github.com
PS 若原先以有其他 SSH 私鑰 用到 id_rsa,此時就不能直接把私鑰檔名改成 id_rsa,可另外設定使用 actions-deploy-key 來連線 SSH
新增檔名為 config 的檔案
# for GitHub
Host github.com
    HostName github.com
    User git
    PreferredAuthentications publickey
    IdentityFile ~/.ssh/actions-deploy-key
SSH key (有密碼版本)
建立 SSH key (有密碼版本)
ssh-keygen -t rsa -b 4096 -f actions-deploy-password-key -N "123"- actions-deploy-password-key.pub (公鑰)
- actions-deploy-password-key (私鑰)
在 GitHub Pages Repo 上設定 Deploy Key
參考上面流程 3,將公鑰設定至 Deploy Key
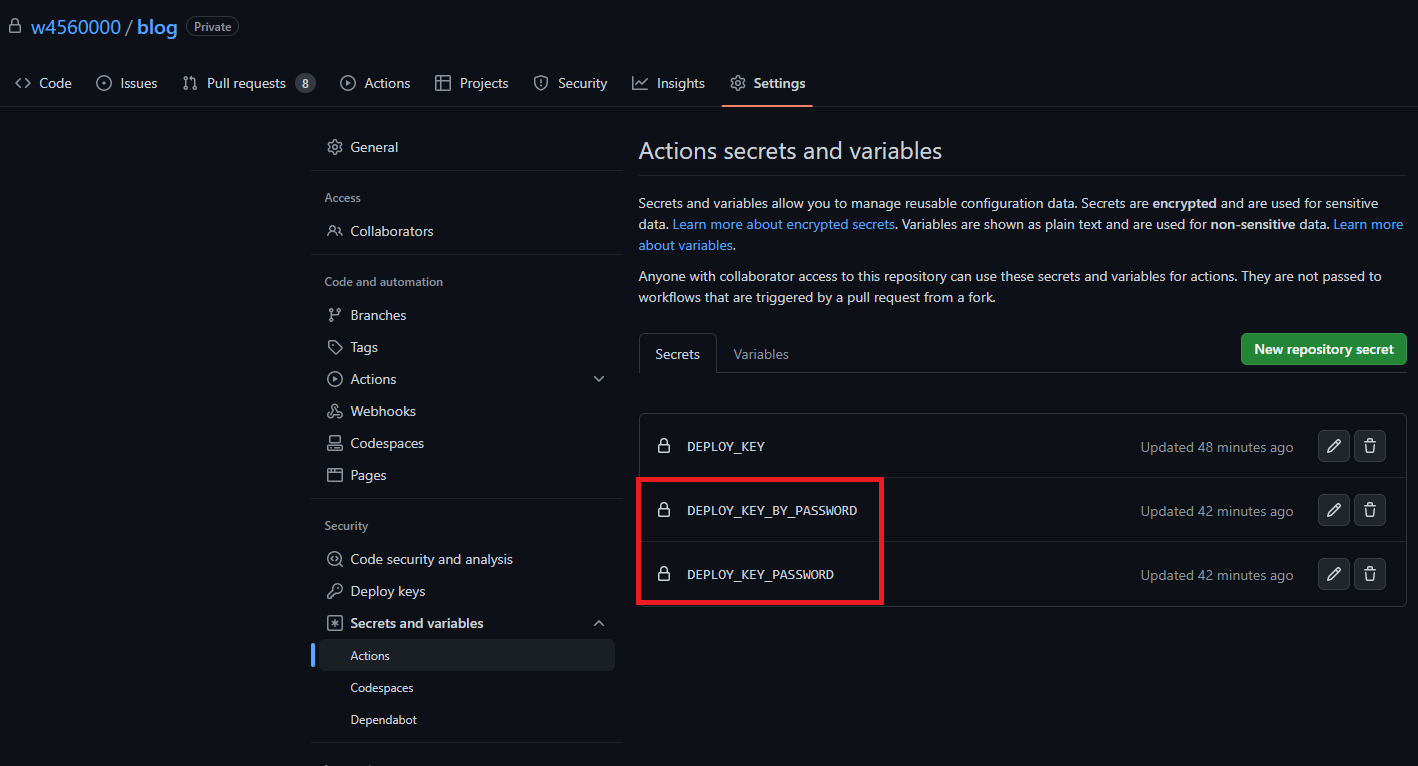
在 Hexo Source Repo 上設定私鑰、密碼
私鑰 = DEPLOY_KEY_BY_PASSWORD
密碼 = DEPLOY_KEY_PASSWORD
調整 GitHub Actions yml檔
name: Deploy

on: [push]

jobs:
build:
    runs-on: ubuntu-latest
    name: Deploy Hexo Blog
    steps:
    - name: Checkout
    uses: actions/checkout@v1

    - name: Cache node modules
    uses: actions/cache@v2
    id: cache
    with:
        path: node_modules
        key: ${{ runner.OS }}-npm-cache
        restore-keys: |
        ${{ runner.OS }}-npm-cache

    - name: Install Dependencies
    run: npm install

    - name: Deploy
    run: |
        mkdir -p ~/.ssh/
-       echo "${{ secrets.DEPLOY_KEY }}" > ~/.ssh/id_rsa
-       chmod 600 ~/.ssh/id_rsa
+       echo 'echo "${{ secrets.DEPLOY_KEY_PASSWORD }}"' > ~/.ssh/.ssh_password
+       chmod +x ~/.ssh/.ssh_password
+       eval $(ssh-agent -s)
+       echo "${{ secrets.DEPLOY_KEY_BY_PASSWORD }}" | tr -d '\r' | DISPLAY=None SSH_ASKPASS=~/.ssh/.ssh_password setsid ssh-add - > /dev/null
        ssh-keyscan github.com >> ~/.ssh/known_hosts

        git config --global user.name "w4560000"
        git config --global user.email "39783609+w4560000@users.noreply.github.com"

        npm run hd

    - name: Get the output
    run: |
        echo "${{ steps.deploy.outputs.notify }}"
參考連結
Jerry Yang’s Blog - Hexo + GitHub Actions 部屬網站遷移全紀錄
ithelp - (27) 試著學 Hexo - 奇淫技巧 - 自動化部屬(GitHub Actions)
GitHub - ssh-agent
StackOverflow - Switching between multiple ssh keys in Git on Windows
StackOverflow - How to send passphrase for ssh-add with GitHub Actions?
StackOverflow - How to run an ansible-playbook with a passphrase-protected-ssh-private-key?
webfactory - Using a SSH deploy key in GitHub Actions to access private repositories
Pablo Daniel González - GitLab CI — SSH with Passphrase deploy example
轉載請註明來源,若有任何錯誤或表達不清楚的地方,歡迎在下方評論區留言,也可以來信至 leozheng0621@gmail.com
如果文章對您有幫助,歡迎斗內(donate),請我喝杯咖啡

